


 Pick a Date


By: Phoebe Ackland, ellaslist
On those 40 degree days, it's far more fun to stay at home in air conditioning than brave the unbearable heat at a playground or the feet-scalding sand on the beach in the middle of the day. Here are some fun and simple craft ideas and cool stuff to make at home to help get you through those hottest-part-of-the-days in one piece, without boredom totally consuming your little ones.
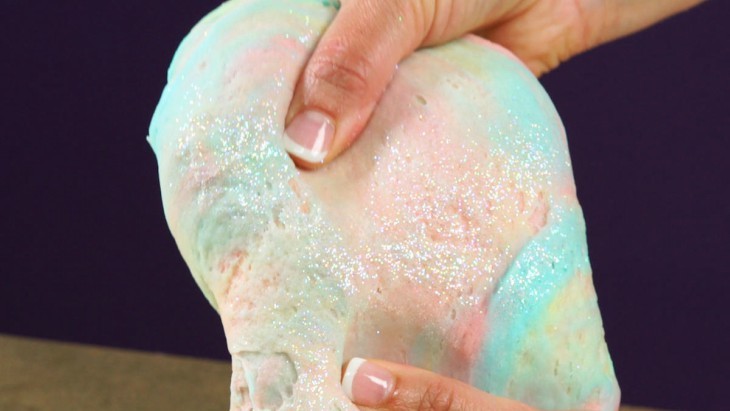
1. Edible Unicorn Slime
Make-your-own-slime recipes are uber popular with the kiddies at the moment, so you could imagine how thrilled your little ones will be to make rainbow slime that you can actually taste this Summer!
What You'll Need:
- 1 1/2 teaspoons edible fine glitter dust
- 1 to 2 teaspoons blue candy sprinkles
- 1 to 2 teaspoons yellow candy sprinkles
- 1 to 2 teaspoons red candy sprinkles
- 2 tablespoons xanthan gum, divided
- 8 1/4 to 10 1/2 cups (about 33 to 42 oz.) powdered sugar, divided, plus more for kneading and storing
- 6 to 9 tablespoons cornstarch, divided
- 1 cup coconut oil, divided
- 3/4 cup water, divided
What To Do:
1. Combine 1/3 cup of the coconut oil, 1/4 cup of the water, and red sprinkles in a medium-sized microwavable bowl, and microwave on HIGH 30 seconds. Whisk until ingredients are well incorporated. Add 2 teaspoons of the xanthan gum, and whisk until mixture begins to solidify. Add 1 cup of the powdered sugar and 1 tablespoon of the cornstarch. Using a spatula, stir until combined and mixture begins to form a “glob.” Gradually add 1 1/2 to 2 cups of the powdered sugar and 1 to 2 tablespoons of the cornstarch, stirring to combine until mixture is solid and stretchy.
2. Transfer slime to a clean work surface, and knead slime, sprinkling with additional powdered sugar as necessary, until most of the oil is absorbed and mixture is less sticky. (If slime starts to get too sticky, lightly roll slime in 1/4 to 1/2 cup of the powdered sugar.) Sprinkle with 1/2 teaspoon of the glitter dust, and knead to incorporate.
3. Repeat steps 1 and 2 once with blue sprinkles to create blue slime, and a second time with yellow sprinkles to create yellow slime.
4. Roll slimes into each of 3 long ropes, and braid ropes together. Knead braided slime together to incorporate colours. When ready to store, roll the slime in additional powdered sugar, and place in an airtight container.
CLICK HERE for an easy how-to video. Enjoy!
via My Recipes
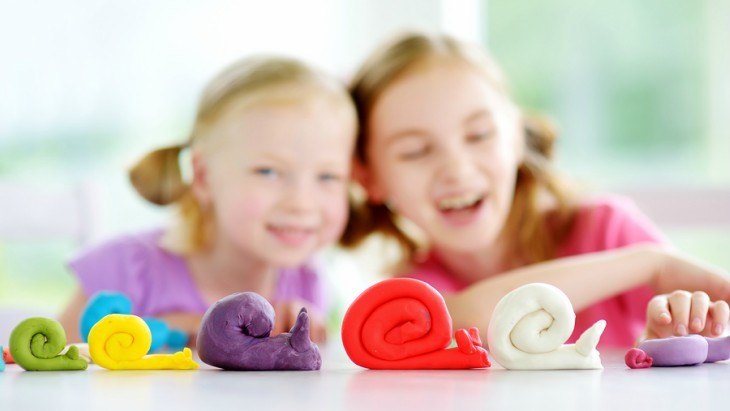
2. Easy Play Dough Recipe
One of the best and simplest things to make at home with toddlers!
Here's What You'll Need:
- 2 cups plain flour
- 2 tablespoons vegetable oil (not olive oil)
- 1/2 cup salt (the cheapest home brand stuff is fine – this helps to stop them eating it)
- 2 tablespoons cream of tartar (available from any supermarket)
- Up to 1.5 cups boiling water (adding in small amounts until it feels likes it’s going to turn into dough)
- A few drops of food colouring
- Few drops glycerine (this is optional)
Top Tip – to make it smell much better, replace the vegetable oil with baby oil. Or simply add a few drops of peppermint or lemon flavouring.
Here's What To Do:
- Mix all the dry ingredients in a bowl, no need to sift the flour (flour, salt, cream of tartar)
- Add the oil (vegetable or baby oil)
- Add your food colouring to the hot water then pour into the dry ingredients.
- Stir until it’s one big lump in the bowl.
- Leave the dough to cool for 5 minutes – then give it a jolly good knead until it’s not sticky anymore, you can add more flour if it’s still a little sticky. You can add the optional glycerine at this point.
For awesome masterpieces to create with the playdough, CLICK HERE.
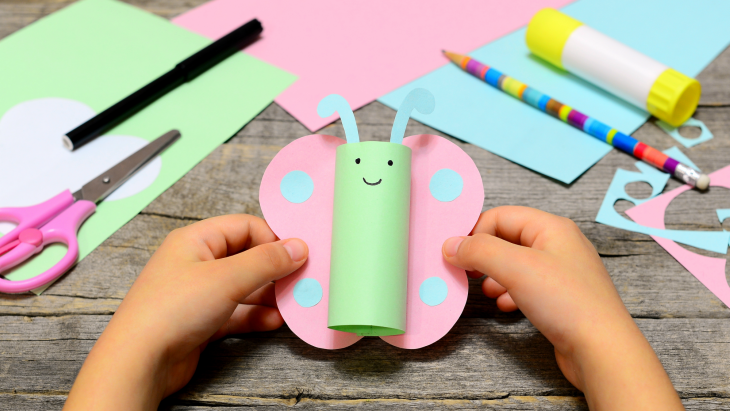
3. Toilet Paper Roll Butterflies
Decorate your child's room with these little beauties! They're super simple, and can be as colourful and magnificent as you dream. You'll need a small toilet paper roll, some sheets of paper in different colours, scissors, glue or clear tape, a marker pen, and any additional bits you might want to decorate with (glitter, pipe cleaners, paint).
1. The Body: Wrap the toilet paper tube in a paper of your colour choice. Choose used wrapping paper, magazine paper, used clean foil, etc. Glue the paper together at the join (or use tape that doesn't show). Alternatively, paint the tube any colour.
2. The Wings: Design the wings to measure the same height as the tube. Make them wide enough to appear balanced. Use a very simple design for the wings, making a mirror image for the opposite side.
3. The Wings: Draw the design onto the scrap cardboard. Cut around each wing (or both wings if you have designed them already joined). The wings can be jazzed up a little by cutting them out with pinking shears.
4. The Wings: It's easiest to decorate the wings before affixing them to the butterfly. Any design is a-okay! Trace the same outline as the wing in decreasing size in different colours, to make a rainbow of colours. Use finger painting, stickers, glitter- anything!
5. Finishing Up: Glue or tape to the wings to the back of the covered toilet paper tube. Check that they appear even each side.
6. The Antenna: Glue two cotton buds at the top end of the butterfly. These form the antennae. They can be coloured by either drawing on them with marker or dipping them first in paint water and letting them dry before affixing to the tube. Alternatively, cut pipe cleaners in half and glue in place. Roll down the top of the pipe cleaner in a spiral, to make it seem more realistic. If you want to be even simpler- use paper cut out in the shape of the antenna!
7. Bring Her to Life: Draw two eyes and a smile at the top end of the butterfly, near the antennae. Alternatively, cut out pieces of felt or scrap paper in the shapes of eyes and a mouth and glue these on.
Thanks to WikiHow for the simple steps.
4. Paper Ladybeetles
There are some trickier methods out there showing you how to make 3D lady beetles, but let's keep it nice and simple with this lady beetle art. All you need is various sheets of coloured paper or cardboard, scissors, glue, and maybe a marker pen.
1. Use one piece of paper/cardboard for the background- green if your ladybird is in the garden, maybe blue if she's flying through the sky.
2. For her body, cut circles from the black paper in various sizes- a big one for her body, a medium-sized one for her head, two small ones for eyes, and a few for decorative dots to be stuck onto her red wings.
3. Cut out two red semi-circles for wings, and stick them at an angle off her black circle body.
4. Cut out two small white circles for the whites of her eyes and stick them on the black head, followed by two smaller black circles.
5. Draw antennae protruding from her head with a marker.
6. Decorate the background however you wish- draw on it with texter, cut out circular coloured dots for flowers, get creative!

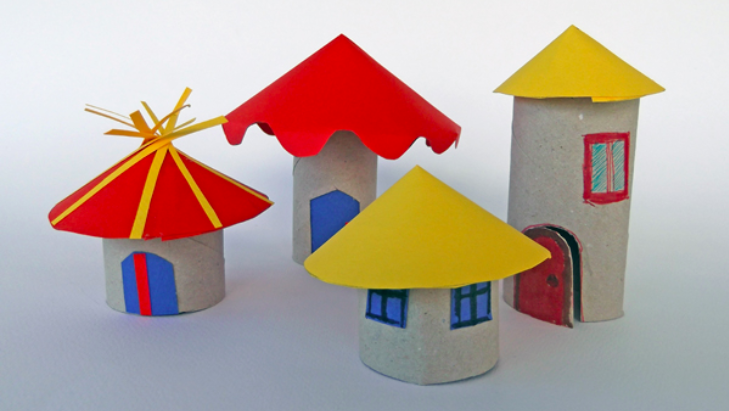
5. Toilet Paper Roll Towns
Create a single abode or get crafty all day long and build a whole little rainbow village! You'll need as many toilet paper rolls as you like, coloured markers, scissors, glue, coloured paper, and any extra decorative bits and pieces you might like.
1. Paint the tube and let it dry, or leave it grey and just draw patterns, windows or designs onto it.
2. Make two angled cuts into one end of the tube to form a point.
3. Fold a 3- by 3 1/2-inch piece of scrapbook paper in half, then set it on the pointed end as a roof. Use tacky glue to secure it. Make two cuts to create a rectangular door (see here for a visual). Glue on a bead for a doorknob.
4. Draw windows onto coloured paper, cut them out, and attach them to the cottage using a glue stick.
5. For a chimney, fold a strip of paper into a four-sided, open-ended box, and glue it to the roof.
Thanks to Parents for the awesome, easy method.
6. Cardboard Doll House
What's a little girl's bedroom without a dream house for her dolls and figurines? The costly Sydney property market might put constraints on extra bedrooms and expansive lounge rooms, but when you create your own doll house, there are no limits to the mansion you can manifest.
CLICK HERE for easy how-tos on all kinds of cardboard abodes including cardboard beds, wall-less houses, extra spacious homes, tall houses, Scandinavian-style houses and everything in between. There are no rules, and you probably have all the materials you need lying around your house or in your recycling bin!

Reviews